Depending on where you are in the world this can mean you may or may not be able to send emails to the contact. Follow this tutorial in importing contacts with their opt-in status
By default, when you import a list for the first time their opt-in status will be “Unconfirmed.”. If you are coming from an old system, you may want to transfer the opt-in status from your previous CRM to MBR CRM so that you can keep continuity.
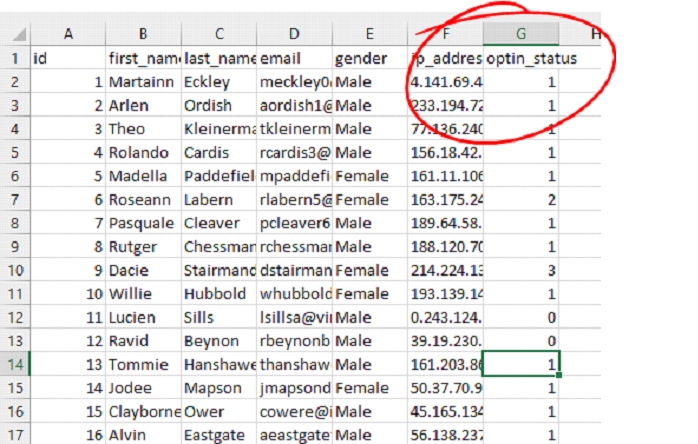
To import contacts with opt-in status you will need to create a column in your CSV called optin_status and set the appropriate value for each option status. The opt-in status of a contact is represented with an integer. the status you will need to create a column in your CSV called optin_status and set the appropriate value for each option status. The opt-in status of a contact is represented with an integer.

- 1. Unconfirmed
- 2. Confirmed
- 3. Unsubscribed
- 4. Weekly
- 5. Monthly
- 6. Bounced
- 7. Complained
It will be easiest to batch import your list for the different opt-in statuses you have. For example…
- Import your Unconfirmed contacts.
- Import your Confirmed contacts
- Import your Unsubscribed contacts
- Etc…
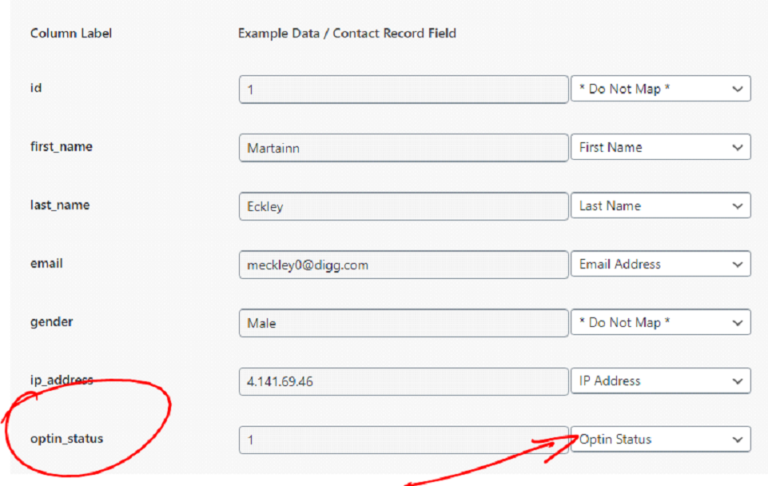
This way you can create the column and use the same number for every row. While importing make sure that the optin_status column in your CSV is mapped to the Optin Status option in the dropdown.


